
inter-API OAuth Services
Introduction
inter-API uses OAuth 2.0 protocol for authentication and authorization. In order to get a response by sending a successful request to API methods, it is necessary to create an access token and use this token value in API requests.
How to Get Started
Step 1 - Sign Up & Register: To start building with our APIs, you'll need to sign up for account. Read our documentation on how to use the Inter-API services and secure your connection with the right electronic certificate
Step 2 - Get Subscription Key: To get your Subscription Key, you'll first need to Subscribe for a package on Products page.
Step 3 - Activate: Get your subscription key under profile menu. You can also add your applications here.
Step 4 - Test API Methods: Include your access token and the information needed for that API. From there, use the response for your application and you’re all set. Now you can start building applications with our API.
Step 5 - For Production: You 're now up and running on inter-API Portal. Submit for production When you’re finished testing, you may want to submit your app for production. If it seems like we’d be a good fit, we’ll look into it and do some testing together. Then, we’ll talk about next steps to move to production.

Api Auth Customer Approval
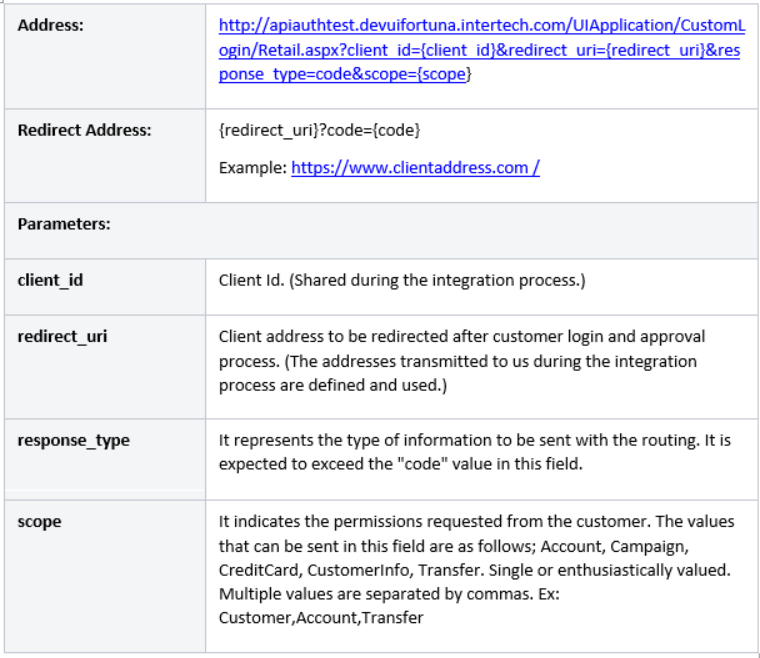
The code value to be used when creating an Access Token is created after the customer logs in and then approves the requested permissions. To generate this code value, it is necessary to make a redirect to the API Auth address. The addresses and parameters to be used in this routing are explained in the table below.
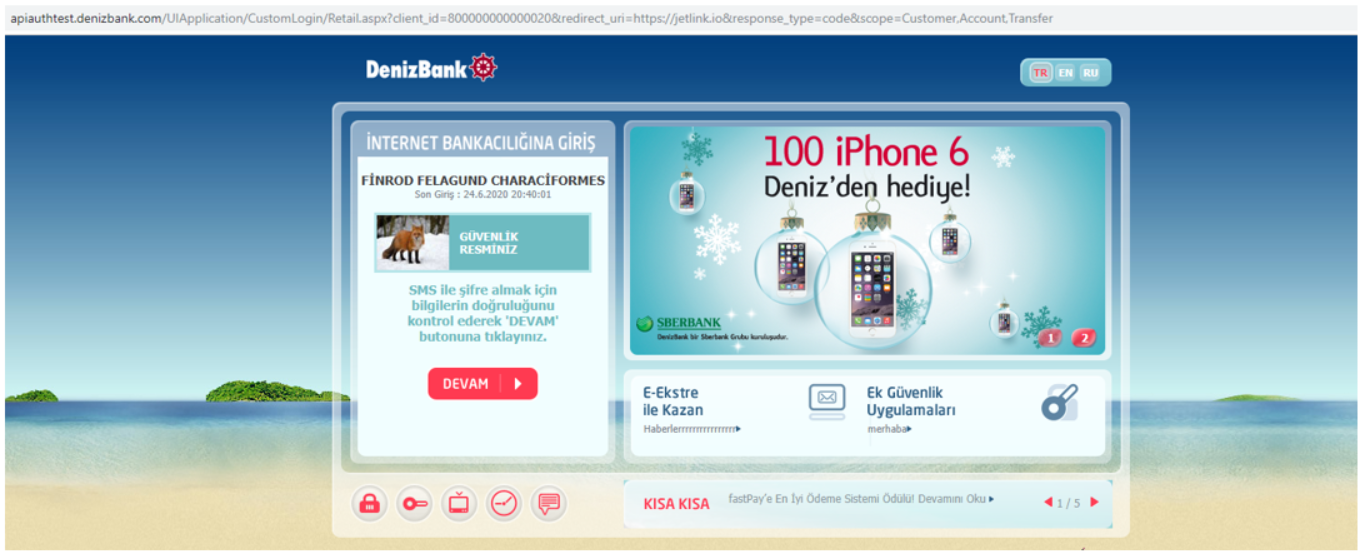
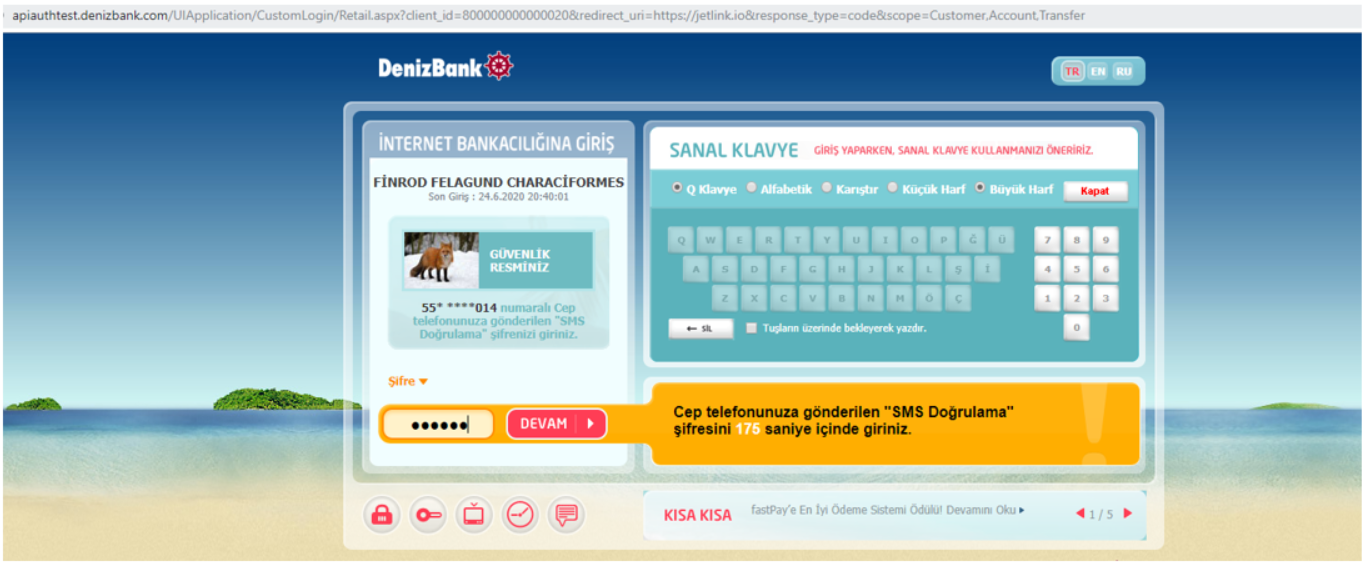
When forwarding to the address obtained with the appropriate parameters, the bank's customer login page is encountered. On this page, if the customer approves the requested permissions after logging in, a redirect is made to the address in redirect_uri with the code value created. The address template in the routing to be made after a successful customer login and approval is shared in the table below.
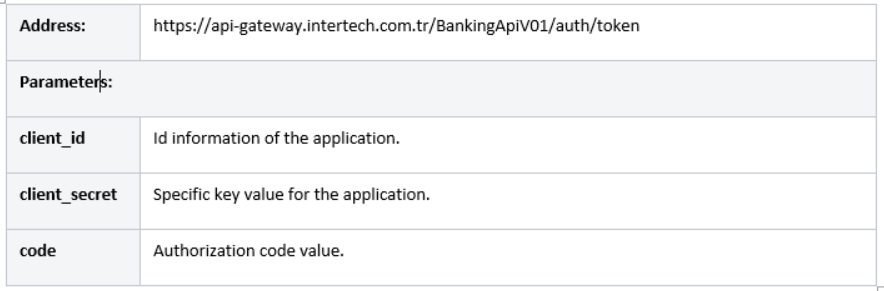
Create Access Token
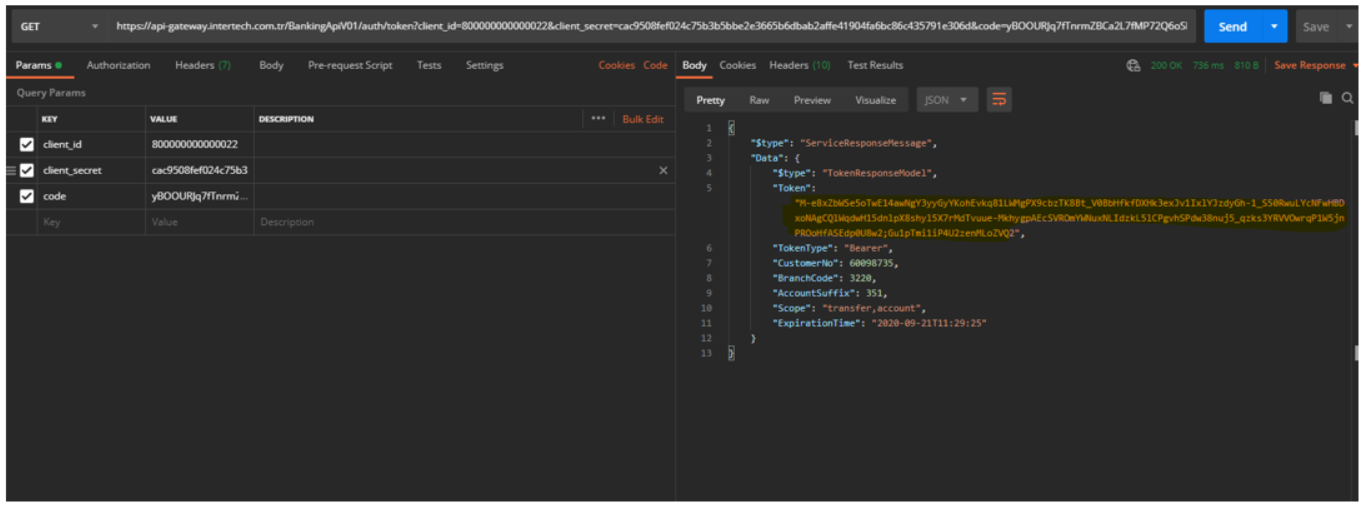
By using the client_id and client_secret parameters together with the obtained code, an access token is created by making a POST request to the token creation address of the API.
The explanations and examples of the fields in the response to be obtained after a successful access token creation request are shared below.

When creating a token, in case of a possible error, a response suitable for the inter-API error format is received. The error codes and explanations that may come in this response are shared below.

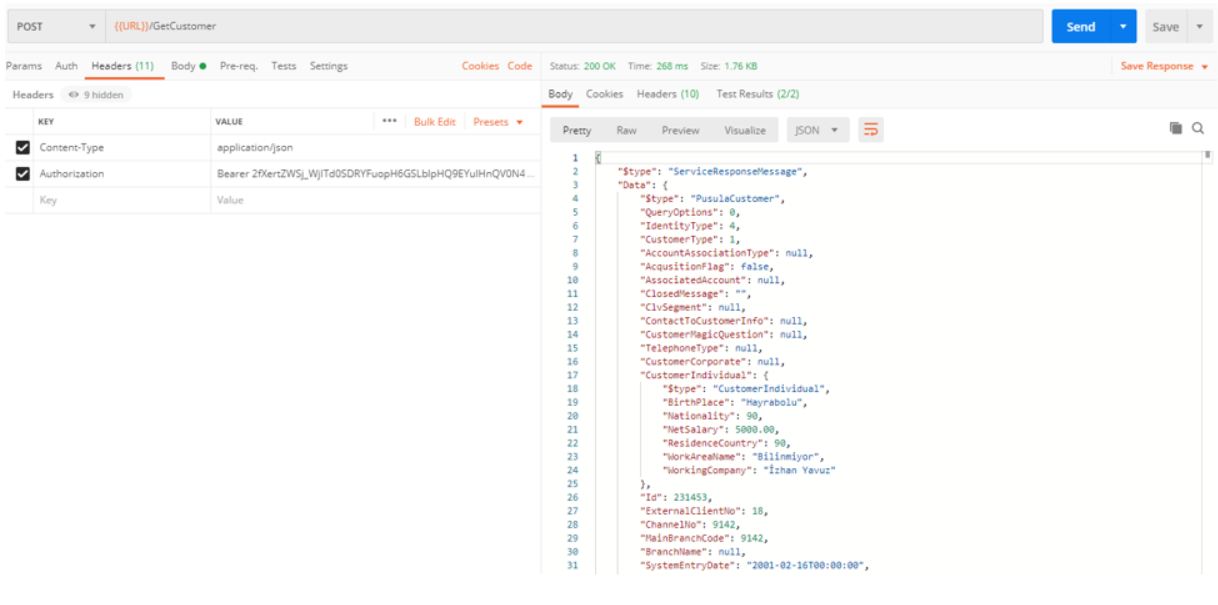
API Request with Access Token
The created token value is used in the Authorization field in the HTTP Header of the requests to be made to API methods. Authorization field value must be in the form of {TokenType} {Token}. An example is given below.
Sample Request
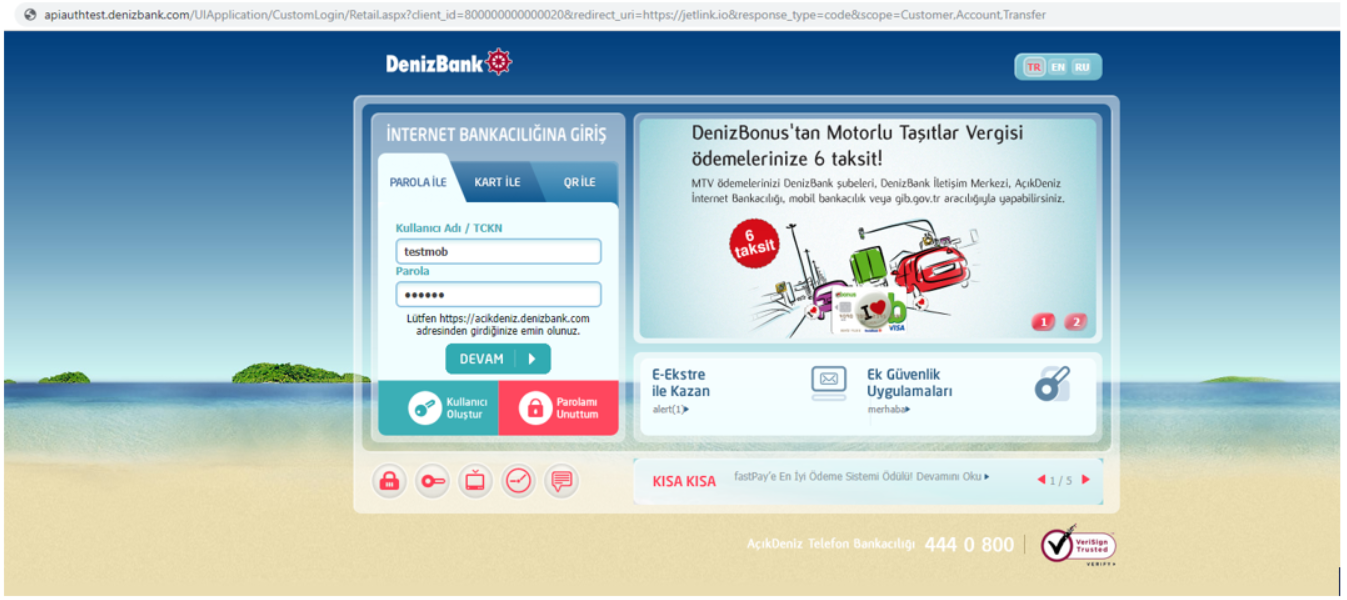
The authorization code value is obtained by entering the customer with the following request and approving. With the token request created in this code, authorization token and customer information can be obtained. With this information, customer information, account information can be obtained, and a money transfer can be made. The steps for this are shared below.
https://apiauth.denizbank.com/CustomLogin/Retail.aspx?client_id=800000000000023&redirect_uri=https://www.parasut.com/&response_type=code&scope=Customer,Account,Transfer
Test Information
AppKey: It will be shared with you.
Client Id: It will be shared with you.
Client Secret: It will be shared with you.
Prod inter-API:
https://apigw.denizbank.com/api/MethodName
oAuth Access Token:
https://apigw.denizbank.com/oauth/Token
Dev API Approval Page:
https://apiauth.denizbank.com/CustomLogin/Retail.aspx?client_id={client_id}&redirect_uri={redirect_uri}&response_type=code&scope={scope}
Customer:
Username: testmob
Password: 123456